

Do you want to gain valuable insights into your Shopify store’s user behaviour, but don’t know where to start? Look no further than HotJar! This powerful tool allows you to heat-map your website and view user recordings, giving you a deeper understanding of how your customers interact with your store.
If you’re having trouble integrating the HotJar code into your Shopify store, don’t panic! I can help guide you through the process step-by-step. With my expert assistance, you’ll be up and running in no time.
Install HotJar on Shopify
Step 1
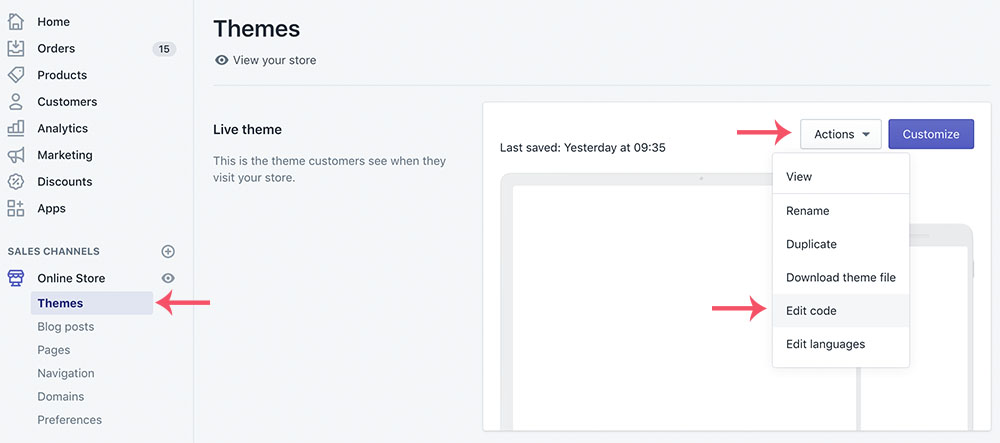
Navigate to the edit code section of your theme by going to: Online Store > Themes > Actions (next to your current theme) > Edit Code
Step 2
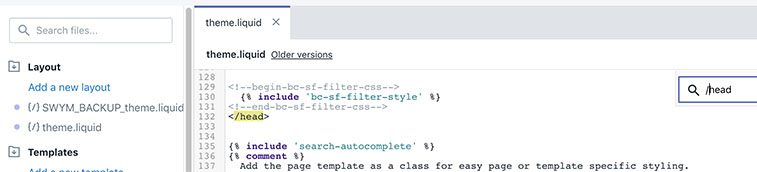
Under the Layout section of the code editor select theme.liquid
Step 3
Find the closing </head> section of the theme.liquid file. Note that some themes will use a variation of this, such as {/head}, [/header] or [/head].
You can search for </head> within the theme.liquid by clicking into the code and pressing CTRL + F on Windows or command + F on Mac.
Step 4
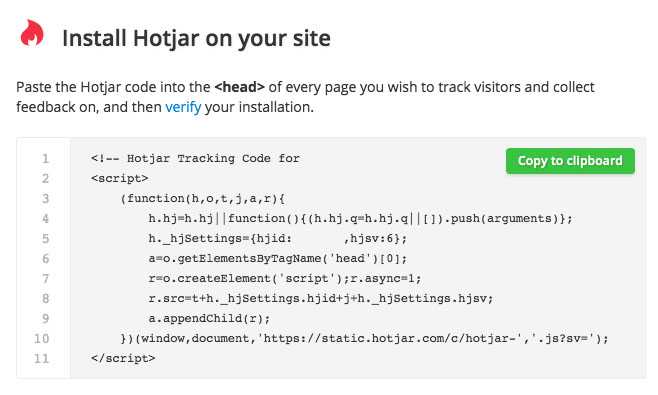
Your install code should be readily available on HotJar if you haven’t verified your installation yet (the whole reason you’re here). Otherwise, you can find it by navigating to your account and clicking the Tracking button in the top right of your account. Copy the code to your clipboard and paste it immediately before the closing </head> tag.
Step 5
Click save to deploy your newly added HotJar code. That’s it for implementing HotJar on the storefront of your Shopify website. Within Shopify you can also add additional code to the Order Confirmation page. Please note, the checkout flow itself will be excluded as Shopify does not support third party scripts here.
Now there isn’t much use in looking at recordings or heat-maps on the order confirmation page, however, deploying HotJar here will allow you to utilise HotJar funnels through to order completion.
In order to install HotJar on the Shopify order confirmation page you will need to navigate to: Settings > Checkout.
Here you will see an Additional Scripts input box. Add your HotJar code here and click save.
Verify Your Install
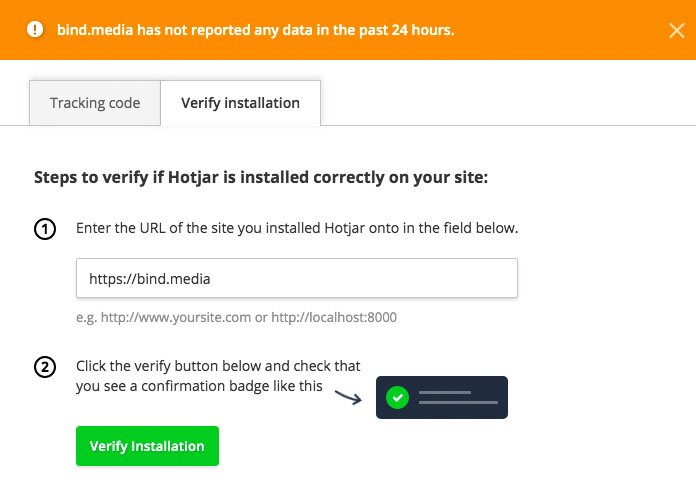
Once you’ve added your HotJar code within Shopify, return to HotJar and verify the install using their built-in checker.
Happy Heat-mapping
That’s it! You’re now ready to start using HotJar to gain valuable insights into your Shopify store’s user behaviour. With its powerful heat-mapping and user recording features, HotJar is the perfect tool for optimizing your store’s performance and increasing conversions.
If you had any trouble with the above steps reach out to us and we’d be happy to help out. Otherwise, sit back, relax and let the data roll in.
If you’re interested in learning more about utilising your newly installed HotJar account, I’ve written an article containing my top tips: Making The Most of Your HotJar Basic Account ?